
Best Practices for Installing Statement Chandeliers
Statement chandeliers are more than just lighting fixtures; they are bold pieces of art that elevate the ambiance and aesthetic of any room. Whether you’re installing a large crystal chandelier in a grand foyer or a modern design in your dining space, proper installation is key to ensuring safety, functionality, and style. In this comprehensive guide, we will walk you through best practices for installing statement chandeliers that not only dazzle but stand the test of time.
Why Installing a Statement Chandelier Correctly Matters
Statement chandeliers are often heavy and complex, requiring careful installation. Improper mounting can lead to safety hazards such as falling fixtures or electrical issues. Moreover, incorrect sizing or placement can detract from the design impact. By following expert-recommended installation practices, you enhance both safety and visual appeal, ensuring your chandelier shines as the centerpiece of your space.
Essential Preparation Steps Before Installation
- Select the Right Location: Identify the focal point of the room where the chandelier will be most effective. Common spots include dining rooms, entryways, and living rooms.
- Determine the Appropriate Size: The chandelier should be proportionate to the room’s size. Oversized or undersized fixtures can look awkward.
- Check the Ceiling Structure: Ensure the ceiling can bear the weight of your chandelier. Reinforcement may be necessary for heavier fixtures.
- Turn Off Power: Safety first! Make sure the electrical supply is turned off at the breaker panel before starting installation.
- Gather Necessary Tools: Have a ladder, voltage tester, screwdriver, wire nuts, mounting bracket, and pliers ready.
Step-by-Step Guide to Installing a Statement Chandelier
1. Assess and Reinforce the Ceiling
Heavy chandeliers often need extra support. Use a fan brace or a wood crossbar secured between ceiling joists to support the fixture’s weight. If unsure, consult a structural expert.
2. Install the Mounting Bracket
Attach the mounting bracket securely to the electrical box with strong screws. This bracket will anchor the chandelier in place.
3. Connect the Wiring
- Use a voltage tester to confirm power is off.
- Connect fixture wires (usually black = hot, white = neutral, green/copper = ground) to the corresponding wires in the ceiling using wire nuts.
- Ensure all connections are tight and secure.
4. Hang the Chandelier
With help, lift the chandelier and attach it to the mounting bracket. Follow the manufacturer’s instructions for locking mechanisms to ensure a firm attachment.
5. Adjust Height and Position
Adjust the chain or rod so the chandelier hangs at the ideal height (see next section for details).
6. Install Bulbs and Test the Fixture
Insert the recommended bulbs and turn the power back on to test the fixture. Confirm that all connections and lights work properly.
Optimal Hanging Heights for Statement Chandeliers
Appropriate hanging height ensures the chandelier enhances your space without obstructing sight lines or movement.
| Room Type | Recommended Height from Floor | Notes |
|---|---|---|
| Dining Room | 30 to 36 inches above tabletop | Ensures unobstructed views and intimate lighting |
| Foyer or Entryway | 7 feet minimum clearance from floor | Accommodates traffic and grand visual impact |
| Living Room | 7 feet or higher from floor | Balances space and illumination |
Safety Tips for Installing Heavy and Complex Fixtures
- Consult a Professional Electrician: For heavy chandeliers or complex wiring, hiring a licensed electrician is the safest choice.
- Use Proper Anchors and Supports: Don’t rely solely on the electrical box for support; reinforce as needed.
- Double Check Electrical Codes: Follow local building and electrical codes to prevent hazards and ensure compliance.
- Work with a Helper: Due to the size and weight, install chandeliers with at least one other person.
Benefits of Installing a Statement Chandelier
Beyond lighting, statement chandeliers offer several advantages:
- Visual Focal Point: Creates an eye-catching centerpiece that anchors the room’s design.
- Enhanced Ambiance: Diffuses light beautifully, adding warmth and sophistication.
- Increased Home Value: Upscale lighting can boost the appeal and value of your property.
- Versatile Style Options: Available in various designs from classic crystal to industrial modern.
Practical Tips to Maintain Your Statement Chandelier
- Regular Dusting: Use a microfiber cloth to dust the fixture weekly to prevent buildup.
- Deep Cleaning: Clean thoroughly every 6 months with gentle glass cleaners or solution recommended by the manufacturer.
- Inspect Wiring Annually: Check electrical connections and mounting brackets for wear or damage.
- Replace Bulbs Promptly: Use the correct wattage and type as specified to avoid overheating or damage.
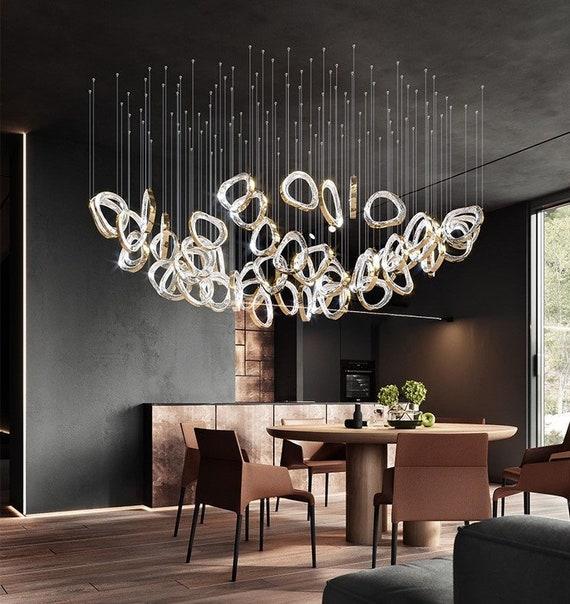
Case Study: Transforming a Dining Room with a Modern Statement Chandelier
Jessica, a homeowner in Chicago, installed a large geometric chandelier over her dining table. Following professional installation best practices:
- She measured the table and ceiling height precisely to order a fixture with perfect scale.
- She had an electrician reinforce the ceiling structure before installation.
- By hanging the chandelier 34 inches above the table, the room felt balanced and inviting.
The result? A chic, functional centerpiece that elevated her dining experience and impressed guests, demonstrating the impact of proper installation techniques.
Conclusion: Illuminate Your Space with Confidence
Installing a statement chandelier combines artistry with technical know-how. By carefully preparing, adhering to safety guidelines, and fine-tuning height and placement, you can ensure your chandelier becomes a stunning, safe, and functional focal point. Whether you’re a DIY enthusiast or plan to hire a professional, these best practices will help you illuminate your home beautifully and confidently.
Ready to install your dream statement chandelier? Follow these tips to create a breathtaking and secure lighting masterpiece that will be admired for years to come!